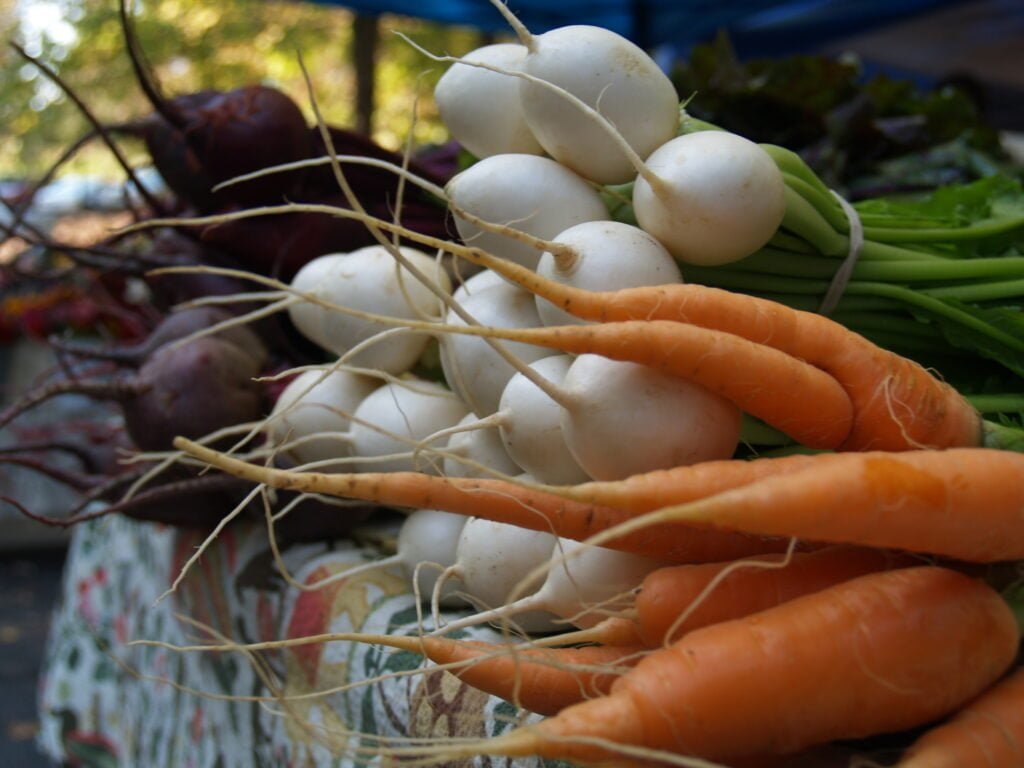
This week’s theme is root vegetables. Our “Growing Minds Day by Day” educational resource lists are designed for families and educators.
Root crops come in many shapes and sizes. Many root crops can be grown in the fall and left in the garden to harvest in November, December, and January. Carrots, beets, and rutabagas are traditional storage vegetables that will withstand many frosts. While frost may damage the tops of the vegetables, the roots will stay safe underground. Consider sowing these vegetables in your school or home garden in the late summer or early fall for harvesting all winter. Kids love harvesting root veggies–it’s exciting to unearth the beautiful root from its hiding place in the soil! To harvest root vegetables, carefully loosen the soil around the root with a trowel or your hands before you pull and tug. Rain also loosens the soil and makes digging root vegetables easy work. Roast root vegetables in the oven, create a root veggie soup, or make them into oven fries or chips.
Books:
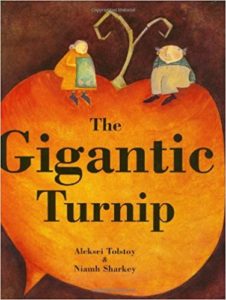 The Gigantic Turnip
by Alexei Tolstoy
This hilarious retelling of the classic Russian folktale about a farmer whose turnip is impossible to pull from the ground uses simple vocabulary and is ideal for reading aloud. There are many versions of this story available as well, including Grandma Lena’s Big Ol’ Turnip and The Enormous Turnip. Each version demonstrates how persistence and cooperation pay off. Watch a fun stop-motion animated read aloud of The Gigantic Turnip on YouTube.
 Rude Ramsay and the Roaring Radishes
by Margaret Atwood
In this fantastic and funny picture book Margaret Atwood offers a deliciously ridiculous tale about the virtues of resisting restrictions. Rude Ramsay has reached the end of his rope! Sick of eating rock-hard rice, wrinkled ravioli, and raw rhinoceros, Ramsay and Ralph the red-nosed rat resolve to leave their rectangular residence in a quest for more refreshing repast and to prove that the grass really is greener on the other side of the fence. Watch a tongue-twisting read aloud of this alliterative story on YouTube.
 Sweet Potato Pie
by Kathleen D. Lindsey
It’s been a dry summer on the farm and money is tight. A family needs $75 quick, or the bank will take their farm away. Luckily, Mama has a great recipe for sweet potato pie, and the Harvest Celebration is coming up the next day. Will they be able to make enough pies in time?The idea for Sweet Potato Pie from the author’s own experience baking and selling her sweet potato pies using an old family recipe that had been passed down for generations. Watch a read aloud on YouTube.
Find more books
Both of the books above are available for Asheville-based educators to check out from our lending library. Visit the Growing Minds’ farm to school literature database to discover more of our favorite children’s books.
Local Food Recipe:
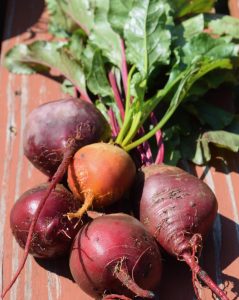 Maple-Glazed Root Veggies
Roasting root vegetables concentrates their natural sugars, making them sweet and tender. This recipe can be easily adapted to include your favorite root veggies. If you would prefer a more savory dish, you can mix in a few garlic cloves or sprigs or fresh herbs (like rosemary or thyme) to the veggies before roasting, and omit the maple syrup or honey.
Families–don’t forget to let kids help prepare this recipe! Depending on their age, kids can…scrub and peel the veggies, cut them up using a kid safe knife, and measure and mix ingredients. Use our Kids Cooking Bingo card to keep track of the cooking skills they’re developing.
Serves 4-6
Ingredients:
- 2 large beets*, peeled
- 4-5 medium carrots, peeled
- 2 Tbsp. butter
- 2 Tbsp. olive oil
- 2 Tbsp. maple syrup or honey
- Salt and pepper
*If you don’t enjoy the earthy flavor of beets, you can substitute with another root vegetable, such as parsnips, turnips, or sweet potato.
Directions:
- Preheat the oven to 425°F.
- Cut carrots and beets into ¼ inch thick, 3 inch long matchsticks, or into 1 inch chunks. Place vegetables in a 13 x 9 inch baking dish or on a rimmed baking sheet.
- Toss veggies with the olive oil and season with salt and pepper.
- Bake for 30-40 minutes, until the veggies are almost tender and can be pierced with a fork.
- Remove from the oven and mix in the butter and maple syrup or honey. Return to the oven for 5 more minutes to melt the butter. Toss to coat before serving.
Educational Resources:
 Growing Minds Lesson Plans
- Roots and Shoots (preschool): Teach children about how vegetables grow and guide them in tasting veggies that grow below ground and above ground.
- Root Exploration (K-2): Introduce students to roots and the ways they function. Talk with students about the 5 “Ws” (who, what, when, where, and why) and teach them as a guide for creating a poem.
- Soil Amendments (K-2): Students learn about the benefits of soil amendments and spend time recording their garden observations.
- Soil Exploration (K-2): Through garden exploration, students will learn about the properties of soil and why soil is important to plants. They will closely observe soil and practice tallying and reporting results of soil experiments.
- Potato Exploration (K-2): Introduce students to potatoes and how they grow. Teach students about measurement and guide them practicing close observation through potato explorations.
- Potato and sweet potato resource list
- Onion (and other bulbs) resource list
Activities:
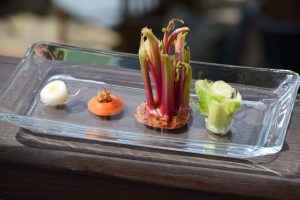 Tiny Islands in the Sea
Follow the directions below to watch root vegetables sprout, creating an imaginary island scene. While the vegetables won’t grow new roots, their leaves will sprout. This activity will show children how easy and rewarding gardening can be, and can also be used to talk to them about food waste and the different ways to recycle or re-purpose food scraps.
Directions:
- Cut the tops off of root vegetables that have sprouted a little, such as carrots, parsnips, turnips, or beets. You can also use the root ends of onions. Cut them about 1/2 inch thick.
- Put a little cold water into a shallow plate. Spread the vegetable tops around the plate.
- Carefully pour in a little more water around the vegetable tops, but don’t cover them.
- Put the dish near a sunny window. Add a little water each day as it evaporates. The shoots will begin to grow from the vegetable tops in a few days. They will start to look like tall trees on islands.
Potato Stamp Holiday Cards
Activity courtesy of BBC Good Food
Supplies:
- Potatoes (makes 2 stamps per potato)
- Small cookie cutters
- Sharp knife (for adult use)
- Paints and paintbrush
- Paper
Directions:
- Halve a potato lengthways to make a long stamp, or across the middle for a smaller stamp. Pat the cut ends dry with kitchen paper or a tea towel.
- Press your chosen cutter into the cut end of one of the potato halves – it doesn’t need to go all the way in, it’s just to create an outline to follow. Carefully use the knife to cut into the potato and around the cutter to create a stamp.
- Remove the cutter from the potato. Your stamp is now ready to use!
- Cover a table with newspaper and squeeze a selection of paints into shallow pots or a tray. Lay out some paper for stamping – kids can either use a paintbrush to load the stamps with paint or dab them into the pots.
What if I don’t have cutters?
Cookie cutters are handy for making potato stamps, but not essential! You can use a knife to cut any shape you wish into the potato. Simple shapes or letters of the alphabet are good choices. Remember to be careful when using a knife.
Tips for potato stamps
- If you want to keep your potato stamps, wrap them well and store in the fridge. They’ll be fine to keep for two to three days – although they may go brown, this won’t affect their stamping ability!
- Use your potato stamps to create homemade cards, tags or wrapping paper, or decorate gift bags and make pictures.
- For the neatest result, it’s best not to add too much paint onto the stamps – dab off the excess before pressing down onto paper.
Root Veggie Mosaics:
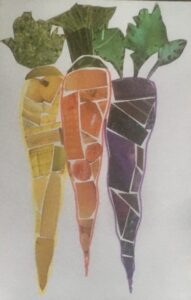 Root vegetables come in many different shapes, sizes, and colors, from round red beets and oblong tri-colored carrots, to white and purple turnips. For this activity, children will use recycled paper scraps to create a beautiful mosaic picture featuring their favorite root vegetables.
Supplies:
- Old magazines, catalogs, wall calendars, or scraps of craft paper
- Blank paper
- Scissors
- Glue stick or school glue
- Colored pencils, crayons, or markers
Directions:
- Cut out small scraps of colored paper and photos from old magazines, catalogs, or paper scraps.
- Sort the paper scraps (aka “mosaic tiles”) into piles or plastic sandwich bags by color.
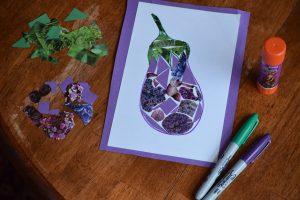
- Use a pencil, crayon, or marker to outline the shape(s) of your favorite root vegetable(s) on a blank sheet of paper.
- Arrange colored paper scraps within the vegetable’s outline in order to color in the vegetable. Once you like the way the scraps are arranged, glue them in place.
 Activity Extensions:
- Write an acrostic poem about your vegetable.
- Research the history of your vegetable and make a presentation for friends and family.
- Cook a recipe that features your vegetable.
Preschool alternative: Think a mosaic is too advanced for your little ones? Try cutting out larger shapes of root veggies from colored paper, then letting kids glue them onto brown paper (soil) to create their own root vegetable collage. How many root vegetables can your child or class name? Radish, carrot, beet, turnip, rutabaga, parsnip, onion, garlic, ginger, sweet potato, and potato are some of the more common root veggies.
—
That’s it for this week. Check back next week for new resources. Click here to access Day by Day resources from past weeks. If you didn’t find what you’re looking for here, please visit our Lesson Plans page.

