This week’s theme is Thanksgiving. Our “Growing Minds Day by Day” educational resource lists are designed for families and educators.
Books:
 In November
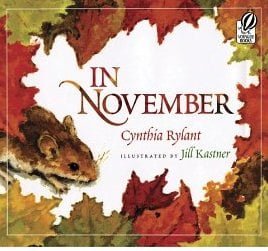
In November the air turns crisp and cold. Families, animals, and insects all gather together for warmth. This story written by Cynthia Rylant is a great book to share with students to celebrate the month of November and the approach of Winter. Watch a read aloud on YouTube.
 We Are Grateful
Otsaliheliga is a Cherokee word that is used to express gratitude (oh-jah-LEE-hay-lee-gah means “we are grateful”). Author Traci Sorell, a citizen of the Cherokee Nation, invites readers to journey through the year with a Cherokee family and their tribal nation as they express thanks for celebrations big and small. “As the crops mature and the sun scorches, we say otsaliheliga … as we sink our teeth into the season’s first harvest at the Green Corn Ceremony.” Watch a kid-friendly interview on StoryMakers with the author, Traci Sorell, then watch a read aloud of the book.
When the Frost is on the Punkin
This poem by Indiana-born American poet James Whitcomb Riley is written in a rural dialect and evokes the feelings of autumn and the activities that happen on a farm during the fall. Watch a read aloud on Youtube.
Find more books
Both of the books above are available for Asheville-based educators to check out from our lending library. Visit the Growing Minds’ farm to school literature database to discover more of our favorite children’s books.
Local Food Recipe:
 The recipe below comes from the Team Nutrition CACFP Multicultural Recipe Project. Prefer a vegetarian version? Try this meat-free recipe for Three Sisters Soup from First Nations Development Institute.
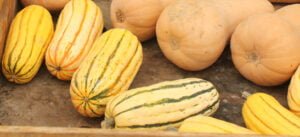
While it’s not known exactly which vegetables were eaten at the Harvest Feast of 1621 (now known as the First Thanksgiving), the three-day event celebrated the English settlers’ first harvest of flint corn, which they had planted with guidance from the Wampanoag tribe. The feast may have included squash, pumpkins, and beans, which were native to the Northeast Woodland region and grown by the Wampanoag. Learn more about the Three Sisters garden planting technique, which is a tradition of many indigenous American people.
Three Sisters Soup
Source: CACFP
This soup is reminiscent of chili. It is a traditional Native American stew consisting of squash, corn, and beans, crops known as the Three Sisters because of the Native American tradition of planting them together in the garden. This practice was good for the soil and yielded healthy vegetables.
Ingredients:
- Nonstick cooking spray
- 4 ounces ground beef, at least 90% lean, raw, fresh or frozen
- 2/3 cup onions, fresh, 1/4″ diced
- 2 cloves garlic, fresh, minced (1 clove is about ½ teaspoon minced)
- 1 tablespoon jalapeno pepper, fresh, seeds and veins removed, minced
- 2/3 cup butternut squash, fresh, ½” cubed
- 1/4 cup green beans, fresh, cut into ½” pieces
- 3 tablespoons corn, frozen
- 1 tablespoon thyme, dried
- 1/4 cup summer squash, fresh, unpeeled, ½” diced
- 1/4 cup zucchini, fresh, unpeeled, ½” diced
- 11 ounces kidney beans, low-sodium, rinsed, and drained or kidney beans, dry, cooked (1½ cups + 2 Tbsp)
- 1/3 cup tomato sauce, canned
- 3/8 cup tomatoes with juice, canned, diced
- 1/4 cup water
Directions:
- Coat a medium skillet with nonstick cooking spray.
- Heat the skillet on medium–high heat.
- Add ground beef, and brown. Heat to 165 °F or higher for at least 15 seconds. Drain.
- In a medium stockpot, add browned beef, onions, garlic, jalapeno peppers, butternut squash, green beans, corn, and thyme. Cook for 4–6 minutes on medium–high heat. Stir occasionally until onions and peppers are tender.
- Add summer squash, zucchini, kidney beans, tomato sauce, tomatoes with juice, and water. Stir well. Bring to a boil.
- Reduce heat to medium, and simmer uncovered for 20 minutes or until vegetables are tender. Stir often. Heat to 140 °F or higher for 15 seconds.
- Serve 2/3 cup.
CACFP CREDITING INFORMATION: ²⁄3 cup (No. 6 scoop) provides Legume as Meat Alternate: 1 1⁄2 oz equivalent meat/meat alternate and 1⁄4 cup vegetable OR Legume as Vegetable: 1⁄4 oz meat and 1⁄2 cup vegetable.
Educational Resources:
 Growing Minds Thanksgiving for Farmers Lesson Plan (K-2): Review activities that happen on the farm and animals that live there. Make the connection between farms and the food we eat each day, emphasizing the importance of community farms. Introduce letter writing, specifically thank you letters, and guide students in writing thank you letters to farmers in your county or region.
This Week in the Garden – Fourth Week in November: Find a seasonal squash recipe, journal topics, and activities that celebrate Thanksgiving and late fall.
National Farm to School Network: Did you know that November is Native American Heritage Month? NFSN has compiled blog posts, articles, curriculum, and other resources that can be used to teach about Native American Heritage Month and the Thanksgiving holiday. These resources center the perspectives of Native communities around the country on the Thanksgiving tradition.
Plimoth Plantation: Find teacher and educator resources that can be used to explore the historic Patuxet tribe, Plymouth settlement, the Mayflower voyage, and the First Thanksgiving, including their Thanksgiving Interactive, “You are the Historian.” Plus find information about the history of the American Thanksgiving holiday, and check out their historic Wampanoag and Pilgrim recipes.
Activities:
 Pumpkin Seed Turkey
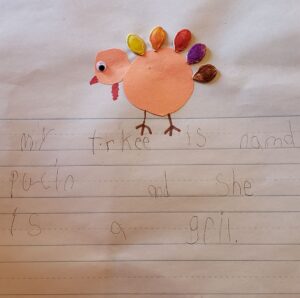
This is a great way to use your seeds from your pumpkins! You can make dyed pumpkin seeds (see instructions below) or you can have children color the seeds with markers. Include a writing prompt to make the turkey’s story come alive for older children.
Supplies:
- Pumpkin seeds
- Glue
- Markers or crayons
- Googly eye (or draw one)
- Construction paper, cut into circles, one for the turkey’s body and one for the head.
- Use additional craft supplies you have on hand to decorate your turkey – Have FUN!
How to Dye Pumpkin Seeds:
- To color pumpkin seeds you’ll need clean, dry, non-salted pumpkin seeds. If you save them from your pumpkin (or winter squash), make sure you clean and dry them well, then store in the refrigerator to prevent mold.
- Next, in a zip lock sandwich bag, add 2 teaspoons rubbing alcohol (from the medicine cabinet) and some food coloring (we like McCormick’s neon food coloring or Wilton gel food coloring) and squish to mix well.
- Add 3/4 cup or so pumpkin seeds, seal and toss to blend colors. Leave them in the bag, flipping them over from time to time until you have the intensity of color you’d like.
- Then, put on parchment paper to dry completely before using. We color pumpkin seeds the night before.
Illustrate a Family Recipe
For many Americans, the Thanksgiving holiday is a time to come together with family and friends to share a celebratory meal. While a lot of families enjoy making the traditional dishes of turkey, stuffing, cranberry sauce, and pumpkin or sweet potato pie, what your family eats on Thanksgiving (or for other fall holiday meals) may be influenced by your regional or cultural heritage, or personal dietary preferences. Choose your favorite Thanksgiving or fall holiday recipe, then illustrate the recipe, either by drawing step-by-step instructions for how to make the recipe, or by simply drawing a picture of the final dish.
Once you’ve completed your illustration, share a memory or story about the dish you chose with a family member or friend. Why do you love this dish? Is it associated with a specific memory or feeling? Do you eat it at other times of the year, or just on holidays? Have you ever helped prepare the dish, or have you only eaten it? Bonus: Illustrating a holiday recipe can earn kids a square on our Fall Garden Bingo card!
Pass the Gratitude Basket
Give pens or pencils and small slips of paper to everyone present and ask them to write down something they are grateful for. Place the “gratitude” notes in a basket or bowl. Pass the basket around the table, and have each person draw out a slip of paper to read. Take turns reading the notes out loud. After reading out loud, the group can try to guess who wrote each gratitude note.
Meet Your Flower Farmer + Make a Centerpiece:
 Meet Loretta Ball, the farmer and floral designer at The Never Ending Flower Farm in Barnardsville, NC, which she operates with help from her husband, mother, and two sons, Quinn and Ledger. Loretta’s farming roots go back to her family’s tobacco farm. She and her family grew a vegetable garden for many years, which gradually transformed into the u-pick flower farm they run today. Watch our interview with Loretta to learn more about their family farm and the beautiful flowers they grow there.
Next, join Quinn and Ledger for a tour of the farm. Hear the boys talk about how they help out on the u-pick farm, from weeding and mowing the grass to helping visitors harvest flowers. They’ll show you “brain” flowers (Celosia) and luffa gourds, plus share some tips for picking flowers. These videos could be used as the starting point to explore many topics with students, including insects and pollination, plant parts, plant life cycles, flowers, or farm life.
Make a Thanksgiving Centerpiece

Flower arrangements are part of many people’s Thanksgiving dinner tables. In colder climates, most garden flowers and wildflowers die back after the first frost of the season, but even in the winter, nature provides beautiful materials that your family or class can use to create a natural centerpiece for the celebratory table! Older children will enjoy scavenging the yard or school garden to find their own dried flowers and leaves. For younger children, you may want to gather an assortment of materials first for them to arrange. Here’s how:
- Collect your materials. First, take a walk around your yard, neighborhood, school garden to gather your materials. Use pruning shears or scissors to snip dried seed heads, grasses, evergreen branches, or other materials. You might also want to collect pine cones, dried leaves, or acorns. Tip: you may want to put garden gloves on to protect your hands as you harvest materials. Some branches or stems may be prickly.
- Find a container to make your arrangement in–you could use a vase, bowl, basket, jar, or flower pot. If you think your arrangement will be tall or top heavy, you might want to put some dried beans, stones, or sand in the bottom of the container to weigh it down and keep it from falling over later.
- Arrange your natural materials in your container. You may want to trim the stems of some to make the branches different heights. To add pine cones of dried leaves to your arrangement, twist craft wire of pipe cleaners around the ends to create a longer stem. Tip: You may want to do the arranging outside to make clean-up easier, as some of the seed pods or dried leaves might shed during arranging.
- Add ribbons, bows, or other decorations to your final arrangement as desired.
—
That’s it for this week. Check back next week for new resources. Click here to access Day by Day resources from past weeks. If you didn’t find what you’re looking for here, please visit our Lesson Plans page.